DIY: Wine bottle charms

All my friends are winos, and like me, most are college students. We fit into the “winos on the cheap” category. While I often find myself gifting bottles of wine, they typically cost around $10-15.

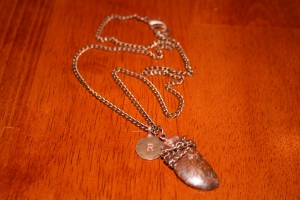
Throwing a wine charm on is my way of saying, “I love you but I’m broke. This wine was cheap, but here’s something pretty to prove I was thinking of you on _________(insert occasion here).”

2015-05-08 17.11.01

Supplies:

  • Wire (20-24 gauge will work best. If you use anything larger, it mind bend funny)
  • Beads
  • Charm (I used stone beads attached with a wrapped loop)
  • 1 Jump ring
  • Pliers
  • Wine bottle
  • Extra wine bottle (optional–wine crafts make me want wine)

Here’s a handy visual in case you’re not familiar with wire gauges:

The break down:

  1. Pick out a few beads or charms that will fit on the wire. Attach charms using a jump ring.
  2. Measure the wire around the bottle. You want it to sit on the top of the shoulder of the bottle so it won’t fall off. Leave about one inch extra and trim.                                    2015-05-08 17.14.21
  3. On on end, bend the wire into a “u” shape going outward (use about 1/2″). Bend the other end into a “u” going up (use the other 1/2″). Hook together around the neck of the bottle.                                                                               2015-05-08 17.20.14
  4. Reward yourself with a glass of wine! (Make sure it’s from a different bottle!)
2015-05-08 17.22.32

Apologies for the poor quality photos. I have shaky hands and (as far as I know) there’s not an app for that!

Mother’s Day roundup

As you know, Mother’s Day is this Sunday. If you didn’t know…maybe this post will help you with your last-minute scramble to find a present.

I believe handmade jewelry is the perfect present to give women (and some men) for any and every holiday. If you’re not crafty, Etsy is a great place to support jewelry makers. And if you are–here’s a few of my favorite DIYs from other bloggers that you can give mom this year:

mom

1. Fabric Button Earrings from Sada Lewis

These require a few extra materials from the craft store, but you can make a ton of them with just a few pieces of material. You can make them for mom now, friends on their birthdays or sisters and aunts for Christmas–the gift you can keep on giving.

2. Barbed Wire Pearl Drop Earrings from Studs and Pearls

If you’ve done any of my DIYs or have made jewelry before, you probably have the materials you need to make these earrings. If you don’t have the fish hook earring parts, you can make them from long head pins. The “barbed wire” and pearl combo is perfect for moms with a little bit of edge.

3. Beaded Pendant Necklace from A Beautiful Mess

I have made a few variations of this necklace before–while this DIY lists the cost of materials as $40, you can easily drop this cost by using thrifted beads, natural materials for charms or mixing and matching beads (A Beautiful Mess uses all black onyx).

4. Beaded Tassel Bracelets from I Spy DIY

This bracelet uses embroidery thread to make a tassel, but you can always use a chain tassel if you don’t have thread. I don’t know about you, but this looks like a grown-up version of the yarn-and-bead bracelets I gave my mom when I was a kid. Pretty and nostalgic!

5. Fiona Paxton Necklace from Thanks, I Made It

Awesome DIY of a Fiona Paxton-inspired necklace. If you don’t have enough chain to make a long version, it would still make a cute short necklace.

Gift ideas on this blog:

Ring bracelet

Stone pendant necklace

Button studs

Beginner necklace

If your mom likes wine, you can also make a charm to dress up a gifted bottle. DIY will be up later today!

Lately, I’m in love with…

..Extra long charm necklaces

If you saw my post about tassels, you know I’m obsessed with them. Last week, I threw together a few necklaces using just two beads and a tassel. I gave one to a friend for her birthday (I wish I could find my camera cord–I love how it turned out. Like, I want to ask for it back). Another one, I love so much I’ve worn it five times in the last week. Every time I’ve worn it, I’ve gotten multiple compliments.

Here it is:

2015-05-07 22.31.53

The beauty of this necklace is that it can be recreated and look entirely unique depending on the beads you choose. You probably can’t tell in this photo, but each bead is on its own headpin with wrapped loops on each end. The tassel has a bead cap (thrifted–I don’t usually have these), but would look good without one if you want to save $$.

When I say “long,” I mean that this bad boy hits right above my belly button. I rarely measure chain when I make necklaces and go with what looks best. This is also because I can’t find my ruler–spring cleaning turned out to be a bust this year! If you want to measure, this graphic might help:

DIY: Ring bracelet

As I mentioned in my last few posts, I lost my camera cord so I can’t upload photos. While I’m writing this, I am laughing at myself. Why? Because I lost it while spring cleaning. Only I could pull off losing things while trying to get more organized. I’m not a big fan of my iPhone camera, but it will do while I reluctantly order a new cord on Amazon. Just be warned: I am a terrible phone camera photographer. Excuse the poor quality.

So on to the topic of ring bracelets. These are also known as slave bracelets, but I will not refer to them this way. (If you want to know why, check out my post from a few weeks ago.)

I think it’s safe to say I’ve made a bajillion of these. I gave most of them away already but I kept my favorite. It gets tangled easily so it’s a little high maintenance, but I love it just the same.

2015-05-07 21.43.14

This one takes quite a bit of planning, measurement and chain (which I’m running low on), so for this DIY I’ll stick to a more basic ring bracelet.

Supplies:

2015-05-07 21.08.30

  • Chain
  • Headpin or eyepin
  • 2-3 jump rings
  • Clasp
  • Bead (you can use any bead or trinket for this DIY–I would suggest something that will sit flat)
  • Pliers (I used round nose, bent nose and wire cutters)
  • Ring (optional)

The set-up:

  1. Measure the ring portion by draping chain around your middle finger. Do not make this tight or it will be hard to put on and will pull when you wear it. Meet the chain ends directly under your knuckle and trim excess chain with wire cutters.
    1. Note: you can use an actual ring hear if you prefer. Attach to chain using a jump ring and bend it tightly to fit the ring.
  2. Slide bead onto headpin/eyepin and loop each end to secure. I originally attached ends to chain using jump rings (as in photos), but I didn’t like how it looked. Instead, I hooked the loops directly onto the chain.
  3. Measure the bracelet part by attaching the end of the chain to the bead piece and wrap around your wrist. Leave a finger or two worth of room and snip with wire cutters.
    1. If you are making this for someone else, use their wrist or ask to borrow a bracelet. 
  4. Attach clasp on one end and jump ring on the other.
  5. Bask in the compliments and jealous glances directed at your masterpiece!

2015-05-07 21.17.22 2015-05-07 21.19.00 2015-05-07 21.21.00 2015-05-07 21.31.13

Got wire scraps?

While working with head pins, you will most likely end up with a pile of trimmings.

What do you do with these? The most obvious answer is to chunk them in the trash, but I like to make them into jump rings. You can’t use the teeny tiny ones for this but if you use longer head pins, you will end up with plenty of scraps that will be pliable.

So here’s how:

Pinch the end between the prongs of your round nose pliers and twist inward until it forms a loop. The size of the jump ring will depend on your plier placement–the closer to the end of the prongs, the smaller it will be. With the ends side-by-side, trim them simultaneously with your wire cutters. Use pliers to close the jump ring.

Almost any jewelry you make will require jump rings, so hopefully this will save you some money and prevent wasting usable material. Happy crafting!

(Note: In my spring cleaning madness, I misplaced my camera cord. Pictures coming soon!)

DIY: Super simple chain tassels

I must admit something. Every time I go to write a DIY post, I want to title it a variation of “super simple,” “easy,” “beginner,” etc. And I probably have, so sorry if it sounds repetitive. I just really wanted to express that this is truly a beginner blog, with projects that anyone can do. If I reference a technique or even a type of pliers, I will typically link to a resource–mine or elsewhere on the interwebs–to guide you through the DIY.

That being said, here is a super simple way to make tassels you can use for earrings or necklaces. Tassels are my favorite. Any time I get stuck on how to finish a pair of earrings, I add tassels and suddenly they look thought out and complete.

My tassel-making method is pretty rough and tumble, and this would be a great opportunity to use scraps of leftover chain. I don’t measure the chain because I like the lengths of each piece to be a little different. You can measure if you prefer.

Open a jump ring and slide on the end of a piece of chain. At the length you would like the tassel to be, fold the chain and slip the top link onto the jump ring. Save your cuts until the end to make sure you like the way it looks. Continue until you fill the jump ring or you’re happy with the tassel.

Close the jump ring and whip out your wire cutters. Cut a link off the bottom of each connected piece to separate them.

(Note: In my spring cleaning madness, I misplaced my camera cord. Pictures coming soon!)

Update: Tassels were a trend at the Met Gala earlier this week (May 5)!

DIY: Stone pendant necklace

In my Thrifty Tuesday post yesterday, I included a photo of some stones I found at a vintage store in Dallas. I couldn’t wait to do something with them, so I came up with a way to make them into pendants. You could do this with any stone you find.

Supplies:

  • Stone
  • Chain
  • Glue (preferably clear glue–I used a hot glue gun and it turned out messy)
  • 1 head pin
  • 3 jump rings
  • Lobster or other clasp

IMG_7585  IMG_7598

Making the pendant

  1. Wrap a scrap of chain around the top of your stone.
  2. Slip head pin through chain on the back and twist ends into a wrapped (or simple) loop at the top.
  3. Secure chain and loop with glue.

Attach pendant to chain and complete with the lobster clasp and jump rings. I also fastened a circular charm with my initial that I found in a vintage store. I only had hot glue, so the back of mine looks a little rough.

IMG_7600  IMG_7597

A clear glue like Gorilla Glue or Super Glue would probably work better. I used about 18″ of chain, so mine hangs about mid-chest. This pendant would also work on a 20-30″ chain.

Thrifty Tuesday

I live in Arlington, Texas–home of many things, but not home to many decent thrift stores. If you are familiar with sub-par thrift stores, as I am, you probably know the struggle of finding something in good condition that has been priced way too high. You know the sort: Forever 21 dresses for a whopping $20, shoes from Target marked $10, or even worse, an entire section of items labeled “better clothing” and priced close to their original value.  

I went thrifting in Arlington today and found this to be my luck. But I am in need of chain and beads and I was determined to find them at a good price.

First up, I visited Thrift Town. They have one of those infamous “better clothing” sections and can be inconsistent with pricing. I found a few good options in the housewares aisle and the toys department:

2015-03-16 11.16.49

Housewares departments of thrift stores are full of knick-knacks. This could easily be taken apart for the seed beads

2015-03-16 11.17.18

A knick-knack with beads and reusable wire

2015-03-16 11.38.14

Bags of small toys like this would be perfect for crafting. They can be painted and used for magnets, necklace pendants, etc., and this bag was only $1.99.

2015-03-16 11.42.29

$8 for a necklace I’m going to take apart? No thank you!

I ultimately passed on buying anything here today. I guess I was too frustrated after visiting the jewelry section. Each item was priced between $5 and $15. Crazy, right? I don’t even pay that much for new jewelry unless it’s real silver or precious stone.

Next I visited Salvation Army, and here’s what I came away with:

IMG_7466

All of these were on sale. Total cost : $5.50

I can’t wait to tear them apart and experiment with the different pieces! Typically you can come away with a better deal than I got on these, but like I said, Arlington thrifting isn’t the best.

Spring Break seashells

2015-03-16 13.34.56  2015-03-16 13.35.53

I get so happy every time Spring Break rolls around. I’m graduating in May so this was my last year to have that glorious week away from campus and feel reinvigorated by sunshine after spending weeks under fluorescent lighting in the library. I admit, that’s a little dramatic and I really don’t spend that much time in the library.

Regardless, I spent last week in Galveston collecting seashells, sipping drinks with cheesy tropical names and freezing my limbs off in the cold March water. I came back with an angry sunburn, a sack full of shells and an itching to make something.

IMG_7442

I posted yesterday about using atypical materials, with things found in nature being one of them. The thing about natural items is that they sometimes smell or contain still-living organisms. Especially seashells. This was my first time crafting with shells, so there might be better ways of cleaning them. This method worked just fine for me:

Supplies:

  • Shells
  • Saucepan or stockpot, depending on amount of shells
  • Spoon or utensil to stir (don’t use anything wooden, as you will definitely want to put this in a dishwasher)
  • Fine mesh strainer
  • Bleach (I used a bleach-based kitchen cleaner)
  • Sponge
  • Clear nail polish (colored if desired)

Sanitize your shells:

  1. Put the shells in the saucepan and cover with water. Boil for 5-10 minutes, stirring occasionally. Drain in a strainer. This might smell really, really bad depending on where you collected the shells.
  2. Move them to a bowl and fill with equal parts water and bleach. Leave overnight.
  3. Pour back through the strainer. Scrub the shells to remove the bleach. I used a little dish soap to help with the smell, and scrubbed over a plastic bag to catch any broken pieces.

IMG_7448  IMG_7454IMG_7470

4. If there are still barnacles or thin layers on your shells, you’re going to want to get rid of them. I used a pair of jewelry pliers to pick them off (make sure to sanitize after).

IMG_7483

5. Lay out to dry, then paint with clear nail polish. My shells lost a lot of color in the washing process, so I painted some with colored nail polish before adding a clear topcoat.

6. Some might contain natural holes (convenient!). For those that don’t, you will probably need a drill. I used a hammer and small nail, but I would not recommend this if you’re attached to any of the shells (a few broke).

IMG_7486

And here’s what I made…

IMG_7502 IMG_7541

Thinking outside the craft store

I’ve already established that thrift stores are the greatest place on Earth. Don’t get me wrong, craft stores are also great. But often times when I turn the corner into the jewelry aisle, I start wanting everything. “Ooh, I want those beads! And that chain! And look, it’s a necklace-making kit!” These thoughts start flooding my head and next thing you know, I can only think of designs with these items.

More often than not, I feel that this craft store state of mind limits my creativity. I start seeing what the displays want me to see–buy this book, this material, make this necklace. People who design craft store displays are geniuses. They play on what’s trendy or what everyone is Pinteresting (not sure of the proper term). When skulls are popular, you will find a display of skulls, next to a book about skull jewelry, next to a kit that makes skull jewelry a snap. Even their websites are this way.  

To bust out of this craft store rut, I like looking for atypical materials. Here are a few examples, and a few DIY projects that might inspire you (some links are to blog posts outside of wreck. renew. repeat.)…

These are just a few ideas to get you thinking outside of the jewelry aisle at the craft store. You can pretty much use any material you come across (as long as it isn’t perishable…). You will still need to visit a craft store for most projects to pick up head pins and jump rings, but grab them and run. Get out into the world and try to find supplies in random places. It may be a disaster sometimes, but craft disasters make for funny stories. Trust me, I have a ton of ’em.

2015-03-16 17.54.03

I made this today from a stone, chain and beads (from thrifted items).