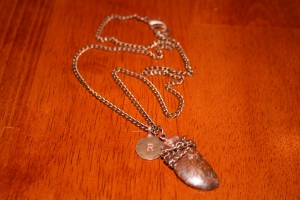
Lately, I’m in love with…

..Extra long charm necklaces

If you saw my post about tassels, you know I’m obsessed with them. Last week, I threw together a few necklaces using just two beads and a tassel. I gave one to a friend for her birthday (I wish I could find my camera cord–I love how it turned out. Like, I want to ask for it back). Another one, I love so much I’ve worn it five times in the last week. Every time I’ve worn it, I’ve gotten multiple compliments.

Here it is:

2015-05-07 22.31.53

The beauty of this necklace is that it can be recreated and look entirely unique depending on the beads you choose. You probably can’t tell in this photo, but each bead is on its own headpin with wrapped loops on each end. The tassel has a bead cap (thrifted–I don’t usually have these), but would look good without one if you want to save $$.

When I say “long,” I mean that this bad boy hits right above my belly button. I rarely measure chain when I make necklaces and go with what looks best. This is also because I can’t find my ruler–spring cleaning turned out to be a bust this year! If you want to measure, this graphic might help:

DIY: No clasp charm necklace

With all the thrifting and digging through my mother’s jewelry box that I’ve done, I have quite the collection of charms.This is probably my favorite DIY necklace project because it requires less materials and finally puts some of those charms to use. Plus, long necklaces are the best ever. Overstatement? I think not. You can layer them or wear them alone, and they can take jeans and a t-shirt to the next level.

Supplies

  • 2 charms (mine were from old clip-on earrings)
  • 3 jump rings
  • chain
  • Wire cutters, 2 pairs of pliers (flat nose and long or bent nose)

The breakdown

  1. Measure how much chain you need by draping it around your neck. Find the length you like each end to hang at and trim the rest with wire cutters. I like one end longer than the other, but you can make them even if you prefer. Although if you make them the same length, it might look like a bolo tie.
  2. Using your pliers, attach one charm to each end with jump rings.
  3. Connect the chains about half-way down using a jump ring. Make sure you can still pull the necklace over your head.

Go crazy with it! This DIY project can use any kind of charms, pendants, knickknacks. If you use something without an existing loop, you can attach it using a headpin and a wrapped loop, like in my beginner necklace project.

(Note: In my spring cleaning madness, I misplaced my camera cord. Pictures coming soon!)

DIY: Super simple chain tassels

I must admit something. Every time I go to write a DIY post, I want to title it a variation of “super simple,” “easy,” “beginner,” etc. And I probably have, so sorry if it sounds repetitive. I just really wanted to express that this is truly a beginner blog, with projects that anyone can do. If I reference a technique or even a type of pliers, I will typically link to a resource–mine or elsewhere on the interwebs–to guide you through the DIY.

That being said, here is a super simple way to make tassels you can use for earrings or necklaces. Tassels are my favorite. Any time I get stuck on how to finish a pair of earrings, I add tassels and suddenly they look thought out and complete.

My tassel-making method is pretty rough and tumble, and this would be a great opportunity to use scraps of leftover chain. I don’t measure the chain because I like the lengths of each piece to be a little different. You can measure if you prefer.

Open a jump ring and slide on the end of a piece of chain. At the length you would like the tassel to be, fold the chain and slip the top link onto the jump ring. Save your cuts until the end to make sure you like the way it looks. Continue until you fill the jump ring or you’re happy with the tassel.

Close the jump ring and whip out your wire cutters. Cut a link off the bottom of each connected piece to separate them.

(Note: In my spring cleaning madness, I misplaced my camera cord. Pictures coming soon!)

Update: Tassels were a trend at the Met Gala earlier this week (May 5)!

DIY: Stone pendant necklace

In my Thrifty Tuesday post yesterday, I included a photo of some stones I found at a vintage store in Dallas. I couldn’t wait to do something with them, so I came up with a way to make them into pendants. You could do this with any stone you find.

Supplies:

  • Stone
  • Chain
  • Glue (preferably clear glue–I used a hot glue gun and it turned out messy)
  • 1 head pin
  • 3 jump rings
  • Lobster or other clasp

IMG_7585  IMG_7598

Making the pendant

  1. Wrap a scrap of chain around the top of your stone.
  2. Slip head pin through chain on the back and twist ends into a wrapped (or simple) loop at the top.
  3. Secure chain and loop with glue.

Attach pendant to chain and complete with the lobster clasp and jump rings. I also fastened a circular charm with my initial that I found in a vintage store. I only had hot glue, so the back of mine looks a little rough.

IMG_7600  IMG_7597

A clear glue like Gorilla Glue or Super Glue would probably work better. I used about 18″ of chain, so mine hangs about mid-chest. This pendant would also work on a 20-30″ chain.

Spring Break seashells

2015-03-16 13.34.56  2015-03-16 13.35.53

I get so happy every time Spring Break rolls around. I’m graduating in May so this was my last year to have that glorious week away from campus and feel reinvigorated by sunshine after spending weeks under fluorescent lighting in the library. I admit, that’s a little dramatic and I really don’t spend that much time in the library.

Regardless, I spent last week in Galveston collecting seashells, sipping drinks with cheesy tropical names and freezing my limbs off in the cold March water. I came back with an angry sunburn, a sack full of shells and an itching to make something.

IMG_7442

I posted yesterday about using atypical materials, with things found in nature being one of them. The thing about natural items is that they sometimes smell or contain still-living organisms. Especially seashells. This was my first time crafting with shells, so there might be better ways of cleaning them. This method worked just fine for me:

Supplies:

  • Shells
  • Saucepan or stockpot, depending on amount of shells
  • Spoon or utensil to stir (don’t use anything wooden, as you will definitely want to put this in a dishwasher)
  • Fine mesh strainer
  • Bleach (I used a bleach-based kitchen cleaner)
  • Sponge
  • Clear nail polish (colored if desired)

Sanitize your shells:

  1. Put the shells in the saucepan and cover with water. Boil for 5-10 minutes, stirring occasionally. Drain in a strainer. This might smell really, really bad depending on where you collected the shells.
  2. Move them to a bowl and fill with equal parts water and bleach. Leave overnight.
  3. Pour back through the strainer. Scrub the shells to remove the bleach. I used a little dish soap to help with the smell, and scrubbed over a plastic bag to catch any broken pieces.

IMG_7448  IMG_7454IMG_7470

4. If there are still barnacles or thin layers on your shells, you’re going to want to get rid of them. I used a pair of jewelry pliers to pick them off (make sure to sanitize after).

IMG_7483

5. Lay out to dry, then paint with clear nail polish. My shells lost a lot of color in the washing process, so I painted some with colored nail polish before adding a clear topcoat.

6. Some might contain natural holes (convenient!). For those that don’t, you will probably need a drill. I used a hammer and small nail, but I would not recommend this if you’re attached to any of the shells (a few broke).

IMG_7486

And here’s what I made…

IMG_7502 IMG_7541

DIY: Beginner necklace

For me, thrift store hunting often results in finding interesting beads. They’re everywhere. In this post, I’m going to show you how to make a basic necklace using chain and a single bead. This is a great project because you can make any bead into a charm and swap them out to match your outfit or mood. This is a very basic, beginner necklace so it might be too easy if you have jewelry making experience. Now for the fun part:IMG_7409

Supplies

  • Interesting bead
  • 3 jump rings
  • 1 head pin
  • Chain, approx. 16″ long
  • Lobster claw or other style clasp
  • Wire cutters, round nose and bent nose pliers

Making the charm

  1. Put the head pin through the bead. Leaving a little space above the bead, use the bent nose pliers to bend the head pin to a 90 degree angle.
  2. With the round nose pliers, pinch the head pin at the bend and loop the pin around it.
  3. Use the bent nose pliers to wrap the end around the space between the bead and the loop. Clip extra wire with your wire cutters.

IMG_7418 IMG_7421 IMG_7425

This is called a wrapped loop. Alternatively, you could make the charm using a simple loop but I like the look of wrapped loops for this necklace.

Chain necklace

  1. Attach a jump ring on one end of your chain, and a jump ring and lobster clasp on the other.
  2. Connect the charm to the chain using a jump ring.
  3. Voila, you’re finished!

IMG_7426 IMG_7431 IMG_7440