DIY Button studs

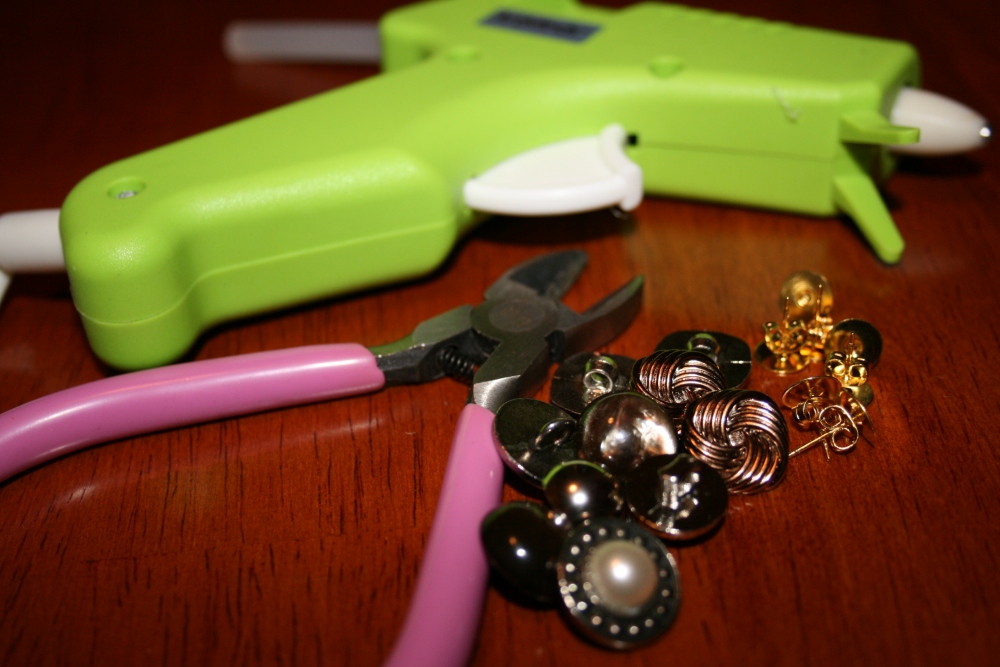
This will be just about the easiest DIY you will ever do, and will take all of five minutes. For my supplies, I used buttons from a bag I bought at a vintage store. I have also used this method to make clip-on earrings into studs. I find clip-ons to be just about the most uncomfortable accessories ever. How did people ever wear clip-ons anyway?  

IMG_7364

Supplies:

Instructions:

Using your handy-dandy wire cutters, clip off the button shanks and try to get the back as flat as possible.

IMG_7367 IMG_7370

Put a dot of glue in the center of the back of the button and press on an earring back. Pick of any excess glue.

IMG_7374 IMG_7376

Done! See, wasn’t that easy?

IMG_7399

Scouring for supplies at thrift stores

Today let’s go on adventure. Not skydiving, no road trip, just a jaunt to the thrift store. As a college student and jewelry maker, the thrift store is my friend and should be yours, too. Say it with me, “The thrift store is my friend.” Walk up to that clear display case with confidence and look critically at its contents. There will be a lot of plain old junk. But if you’re lucky, you’ll find some usable chain, interesting pendants or beads you can reuse. Try not to judge pieces by what they look like now. The point is to rip them apart, after all. Some of my favorite pieces I’ve made have been crafted from old, tacky jewelry.

IMG_7343

This is probably my favorite thing I’ve ever made, and I created it out of an old charm bracelet.

IMG_7347

These earrings are also entirely made from jewelry I found at the thrift store.

IMG_7324

I love old buttons. Mainly because they make for a super easy afternoon project. I have about a million pairs of stud earrings that I made from vintage buttons.

You can save a lot of money finding supplies at the thrift store. And when I say a lot, I mean it. Most vintage or thrift stores sell old jewelry in bags, sometimes for as little as $1. There is literally nothing that cheap in the jewelry aisles of craft stores. Plus, thrift stores are fun. You never know what you’re going to find.

Frankie Says Macramé: Easy How-to

In my last post, I mentioned using macramé to loosen up. There are many different patterns, but I am going to show you a basic bracelet pattern. These make for awesome homemade gifts or look great stacked. Here we go:

IMG_7205

Supplies:

  • String (yarn or twine is okay, but is sometimes hard to work with. I use hemp cord, which you can find in the jewelry aisle of craft stores)
  • Scissors
  • Tape
  • Hard surface
  • Beads (optional)
  • Wine (optional)

The basic set-up:

  1. Measure about one yard* of cord and fold in half. Put a piece of tape about two inches from the top. Tape the two hanging strings near the bottom to hold in place. (This will be string “A”)
  2. Measure another three yards of cord and tie a knot under the tape, leaving the two hanging ends even.
  3. Pull the right end (string “C”) across A and underneath the left end (string “B”).
  4. Pull B underneath A and C.
  5. Pull ends to form a knot.
  6. Repeat the process, this time bringing B across A to the right side and pulling C through to form a knot. Continue forming knots, alternating between the right and left side.

*All measurements are approximate. 1 yard = nose to fingertip, 1 inch = middle portion of index finger.

1  2  3

4  5  6

Adding beads

Simply string beads on A and continue knotting.

bead

Finishing up

When knotted part fits around your wrist, you’re ready to tie it off. The easiest way to do this is to knot the end around itself and use the loop as a closure, but I prefer a more finished look. Your other option is to make a sliding closure:

  1. Tie each end onto itself and right against the knots (on one end you will still have four strings, so tie all and trim the ends of the two shortest ones). Tie a regular knot on the ends.
  2. Tape the strings next to each other.
  3. Use a short piece of cord and make a few macramé knots (10-15) around the four strings. Tie off with two regular knots and trim the ends.

11 12 13

Your bracelet is ready to go! Adjust the slider to fit your wrist and tuck in the loose strings.

b

a

Frankie Says Macramé

When I was in elementary school, my mother came home one day with a bag of old cigar boxes. She went out to the garage, tapped a nail into the top of each and tossed beads and twine inside. Then she taught my sister and I how to macramé, tying the start of each bracelet to the nail and showing us how to tie the knots and slip on beads.

The cigar boxes are long gone, but I still macramé. In the same way that athletes warm up by stretching and writers by free writing, I use macramé to loosen up before playing with wire and chain. It isn’t too tedious, so I’m able to relax and make the knots without over-thinking it.

If you get frustrated while learning how to bead and wire wrap, take a step back and macramé. It’s easy, it’s fun and it’s cheap. Packs of cord cost around $5, and make about 1,000 bracelets (not literally, but they last a long time). 

Macramé bracelets are also incredibly easy to customize. You can change the type of beads, color of the string or the braiding patterns. Check out my next post for a super simple pattern to get you started!

IMG_7285

Building your arsenal: Pliers

What to buy

Before you run out and spend a boatload of money on jewelry making supplies (trust me, it isn’t hard to do), it is important first to get a sturdy set of pliers. You might already have pliers in your toolbox, but jewelry making requires smaller, more precise tools.

There are five pliers you should buy before you start, and most stores that carry jewelry making supplies will sell them as a set (I bought mine at Michael’s for $10). You can buy them separately, but I recommend buying all five together. It costs less, and having all of them will make your life easier.

Long (or Chain) Nose Pliers—These have longer ends to grip wire or jump rings.

Round Nose Pliers—Round ends let you form loops.

Bent Nose Pliers—I spent a long time not knowing what to do with these but they’re actually really useful, especially in wire wrapping.

Flat Nose Pliers—I use these mainly to hold wires in place, as the flat end won’t create creases.

Wire Cutter—You will wear these out so make sure to get a durable pair.

Practice before spending any more money

Unless you are a jewelry-making prodigy, you will probably throw out or take apart the first few pieces you make. Or maybe that’s just me. It took a lot of practice and playing around to find my style.

Before you buy chain, beads or stone settings, buy headpins. Plain old, flat head pins. Practice loops and wrapped loops, cutting wire and opening and closing jump rings on necklaces you already own (most necklaces will have them). Once you gain confidence using pliers, the rest will be a cakewalk.

Create even if you aren’t creative

“That’s nice, but are you any good?”

I’ve heard this phrase many times when I tell people I make jewelry. The truth of it is that I use jewelry making to deal, not because I am good at it. The more I make, the more I feel relaxed and able to hack it.

In a world of Netflix and DVRs, it’s easy to get home and turn the TV on to feel released from the stress of the day. I admit it; I recently binge-watched all nine seasons of The Office. But studies have linked more time in front of the TV to higher odds of becoming depressed, with one study reporting rates of depression up to 8% higher in teens who watched more TV.

On the other hand, practicing some kind of creative outlet has shown to promote self-healing and even physical health. The important thing is to find something you want to do, and whether you’re good at it or not doesn’t matter.

I found jewelry making by accident. A friend—who shall remain nameless—gave me a necklace for my birthday one year and it was the gaudiest, tackiest gift I ever received. The “bones” of it were good, but the final product was terrible. I borrowed a pair of pliers and began tearing it apart, putting it back together, then tearing it apart again. I ended up with two new necklaces, a pair of earrings and a new hobby.

Not everything I make is a work of art, but the act of creating something with my own hands is worth the time and effort. The world would be a better place if more people found their creative outlet, so get out there and just do something. Carve a piece of wood. Do a jigsaw puzzle. Make a collage. Do whatever the hell you feel, and you will feel fantastic.