DIY: Wine bottle charms

All my friends are winos, and like me, most are college students. We fit into the “winos on the cheap” category. While I often find myself gifting bottles of wine, they typically cost around $10-15.

Throwing a wine charm on is my way of saying, “I love you but I’m broke. This wine was cheap, but here’s something pretty to prove I was thinking of you on _________(insert occasion here).”

2015-05-08 17.11.01

Supplies:

  • Wire (20-24 gauge will work best. If you use anything larger, it mind bend funny)
  • Beads
  • Charm (I used stone beads attached with a wrapped loop)
  • 1 Jump ring
  • Pliers
  • Wine bottle
  • Extra wine bottle (optional–wine crafts make me want wine)

Here’s a handy visual in case you’re not familiar with wire gauges:

The break down:

  1. Pick out a few beads or charms that will fit on the wire. Attach charms using a jump ring.
  2. Measure the wire around the bottle. You want it to sit on the top of the shoulder of the bottle so it won’t fall off. Leave about one inch extra and trim.                                    2015-05-08 17.14.21
  3. On on end, bend the wire into a “u” shape going outward (use about 1/2″). Bend the other end into a “u” going up (use the other 1/2″). Hook together around the neck of the bottle.                                                                               2015-05-08 17.20.14
  4. Reward yourself with a glass of wine! (Make sure it’s from a different bottle!)
2015-05-08 17.22.32

Apologies for the poor quality photos. I have shaky hands and (as far as I know) there’s not an app for that!

Mother’s Day roundup

As you know, Mother’s Day is this Sunday. If you didn’t know…maybe this post will help you with your last-minute scramble to find a present.

I believe handmade jewelry is the perfect present to give women (and some men) for any and every holiday. If you’re not crafty, Etsy is a great place to support jewelry makers. And if you are–here’s a few of my favorite DIYs from other bloggers that you can give mom this year:

mom

1. Fabric Button Earrings from Sada Lewis

These require a few extra materials from the craft store, but you can make a ton of them with just a few pieces of material. You can make them for mom now, friends on their birthdays or sisters and aunts for Christmas–the gift you can keep on giving.

2. Barbed Wire Pearl Drop Earrings from Studs and Pearls

If you’ve done any of my DIYs or have made jewelry before, you probably have the materials you need to make these earrings. If you don’t have the fish hook earring parts, you can make them from long head pins. The “barbed wire” and pearl combo is perfect for moms with a little bit of edge.

3. Beaded Pendant Necklace from A Beautiful Mess

I have made a few variations of this necklace before–while this DIY lists the cost of materials as $40, you can easily drop this cost by using thrifted beads, natural materials for charms or mixing and matching beads (A Beautiful Mess uses all black onyx).

4. Beaded Tassel Bracelets from I Spy DIY

This bracelet uses embroidery thread to make a tassel, but you can always use a chain tassel if you don’t have thread. I don’t know about you, but this looks like a grown-up version of the yarn-and-bead bracelets I gave my mom when I was a kid. Pretty and nostalgic!

5. Fiona Paxton Necklace from Thanks, I Made It

Awesome DIY of a Fiona Paxton-inspired necklace. If you don’t have enough chain to make a long version, it would still make a cute short necklace.

Gift ideas on this blog:

Ring bracelet

Stone pendant necklace

Button studs

Beginner necklace

If your mom likes wine, you can also make a charm to dress up a gifted bottle. DIY will be up later today!

Lately, I’m in love with…

..Extra long charm necklaces

If you saw my post about tassels, you know I’m obsessed with them. Last week, I threw together a few necklaces using just two beads and a tassel. I gave one to a friend for her birthday (I wish I could find my camera cord–I love how it turned out. Like, I want to ask for it back). Another one, I love so much I’ve worn it five times in the last week. Every time I’ve worn it, I’ve gotten multiple compliments.

Here it is:

2015-05-07 22.31.53

The beauty of this necklace is that it can be recreated and look entirely unique depending on the beads you choose. You probably can’t tell in this photo, but each bead is on its own headpin with wrapped loops on each end. The tassel has a bead cap (thrifted–I don’t usually have these), but would look good without one if you want to save $$.

When I say “long,” I mean that this bad boy hits right above my belly button. I rarely measure chain when I make necklaces and go with what looks best. This is also because I can’t find my ruler–spring cleaning turned out to be a bust this year! If you want to measure, this graphic might help:

DIY: Ring bracelet

As I mentioned in my last few posts, I lost my camera cord so I can’t upload photos. While I’m writing this, I am laughing at myself. Why? Because I lost it while spring cleaning. Only I could pull off losing things while trying to get more organized. I’m not a big fan of my iPhone camera, but it will do while I reluctantly order a new cord on Amazon. Just be warned: I am a terrible phone camera photographer. Excuse the poor quality.

So on to the topic of ring bracelets. These are also known as slave bracelets, but I will not refer to them this way. (If you want to know why, check out my post from a few weeks ago.)

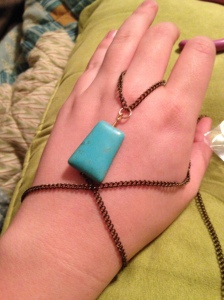
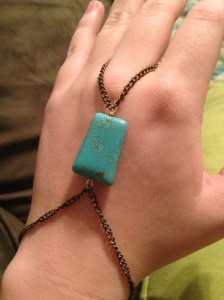
I think it’s safe to say I’ve made a bajillion of these. I gave most of them away already but I kept my favorite. It gets tangled easily so it’s a little high maintenance, but I love it just the same.

2015-05-07 21.43.14

This one takes quite a bit of planning, measurement and chain (which I’m running low on), so for this DIY I’ll stick to a more basic ring bracelet.

Supplies:

2015-05-07 21.08.30

  • Chain
  • Headpin or eyepin
  • 2-3 jump rings
  • Clasp
  • Bead (you can use any bead or trinket for this DIY–I would suggest something that will sit flat)
  • Pliers (I used round nose, bent nose and wire cutters)
  • Ring (optional)

The set-up:

  1. Measure the ring portion by draping chain around your middle finger. Do not make this tight or it will be hard to put on and will pull when you wear it. Meet the chain ends directly under your knuckle and trim excess chain with wire cutters.
    1. Note: you can use an actual ring hear if you prefer. Attach to chain using a jump ring and bend it tightly to fit the ring.
  2. Slide bead onto headpin/eyepin and loop each end to secure. I originally attached ends to chain using jump rings (as in photos), but I didn’t like how it looked. Instead, I hooked the loops directly onto the chain.
  3. Measure the bracelet part by attaching the end of the chain to the bead piece and wrap around your wrist. Leave a finger or two worth of room and snip with wire cutters.
    1. If you are making this for someone else, use their wrist or ask to borrow a bracelet. 
  4. Attach clasp on one end and jump ring on the other.
  5. Bask in the compliments and jealous glances directed at your masterpiece!

2015-05-07 21.17.22 2015-05-07 21.19.00 2015-05-07 21.21.00 2015-05-07 21.31.13

DIY: No clasp charm necklace

With all the thrifting and digging through my mother’s jewelry box that I’ve done, I have quite the collection of charms.This is probably my favorite DIY necklace project because it requires less materials and finally puts some of those charms to use. Plus, long necklaces are the best ever. Overstatement? I think not. You can layer them or wear them alone, and they can take jeans and a t-shirt to the next level.

Supplies

  • 2 charms (mine were from old clip-on earrings)
  • 3 jump rings
  • chain
  • Wire cutters, 2 pairs of pliers (flat nose and long or bent nose)

The breakdown

  1. Measure how much chain you need by draping it around your neck. Find the length you like each end to hang at and trim the rest with wire cutters. I like one end longer than the other, but you can make them even if you prefer. Although if you make them the same length, it might look like a bolo tie.
  2. Using your pliers, attach one charm to each end with jump rings.
  3. Connect the chains about half-way down using a jump ring. Make sure you can still pull the necklace over your head.

Go crazy with it! This DIY project can use any kind of charms, pendants, knickknacks. If you use something without an existing loop, you can attach it using a headpin and a wrapped loop, like in my beginner necklace project.

(Note: In my spring cleaning madness, I misplaced my camera cord. Pictures coming soon!)

Got wire scraps?

While working with head pins, you will most likely end up with a pile of trimmings.

What do you do with these? The most obvious answer is to chunk them in the trash, but I like to make them into jump rings. You can’t use the teeny tiny ones for this but if you use longer head pins, you will end up with plenty of scraps that will be pliable.

So here’s how:

Pinch the end between the prongs of your round nose pliers and twist inward until it forms a loop. The size of the jump ring will depend on your plier placement–the closer to the end of the prongs, the smaller it will be. With the ends side-by-side, trim them simultaneously with your wire cutters. Use pliers to close the jump ring.

Almost any jewelry you make will require jump rings, so hopefully this will save you some money and prevent wasting usable material. Happy crafting!

(Note: In my spring cleaning madness, I misplaced my camera cord. Pictures coming soon!)

DIY: Super simple chain tassels

I must admit something. Every time I go to write a DIY post, I want to title it a variation of “super simple,” “easy,” “beginner,” etc. And I probably have, so sorry if it sounds repetitive. I just really wanted to express that this is truly a beginner blog, with projects that anyone can do. If I reference a technique or even a type of pliers, I will typically link to a resource–mine or elsewhere on the interwebs–to guide you through the DIY.

That being said, here is a super simple way to make tassels you can use for earrings or necklaces. Tassels are my favorite. Any time I get stuck on how to finish a pair of earrings, I add tassels and suddenly they look thought out and complete.

My tassel-making method is pretty rough and tumble, and this would be a great opportunity to use scraps of leftover chain. I don’t measure the chain because I like the lengths of each piece to be a little different. You can measure if you prefer.

Open a jump ring and slide on the end of a piece of chain. At the length you would like the tassel to be, fold the chain and slip the top link onto the jump ring. Save your cuts until the end to make sure you like the way it looks. Continue until you fill the jump ring or you’re happy with the tassel.

Close the jump ring and whip out your wire cutters. Cut a link off the bottom of each connected piece to separate them.

(Note: In my spring cleaning madness, I misplaced my camera cord. Pictures coming soon!)

Update: Tassels were a trend at the Met Gala earlier this week (May 5)!

What’s in a name?

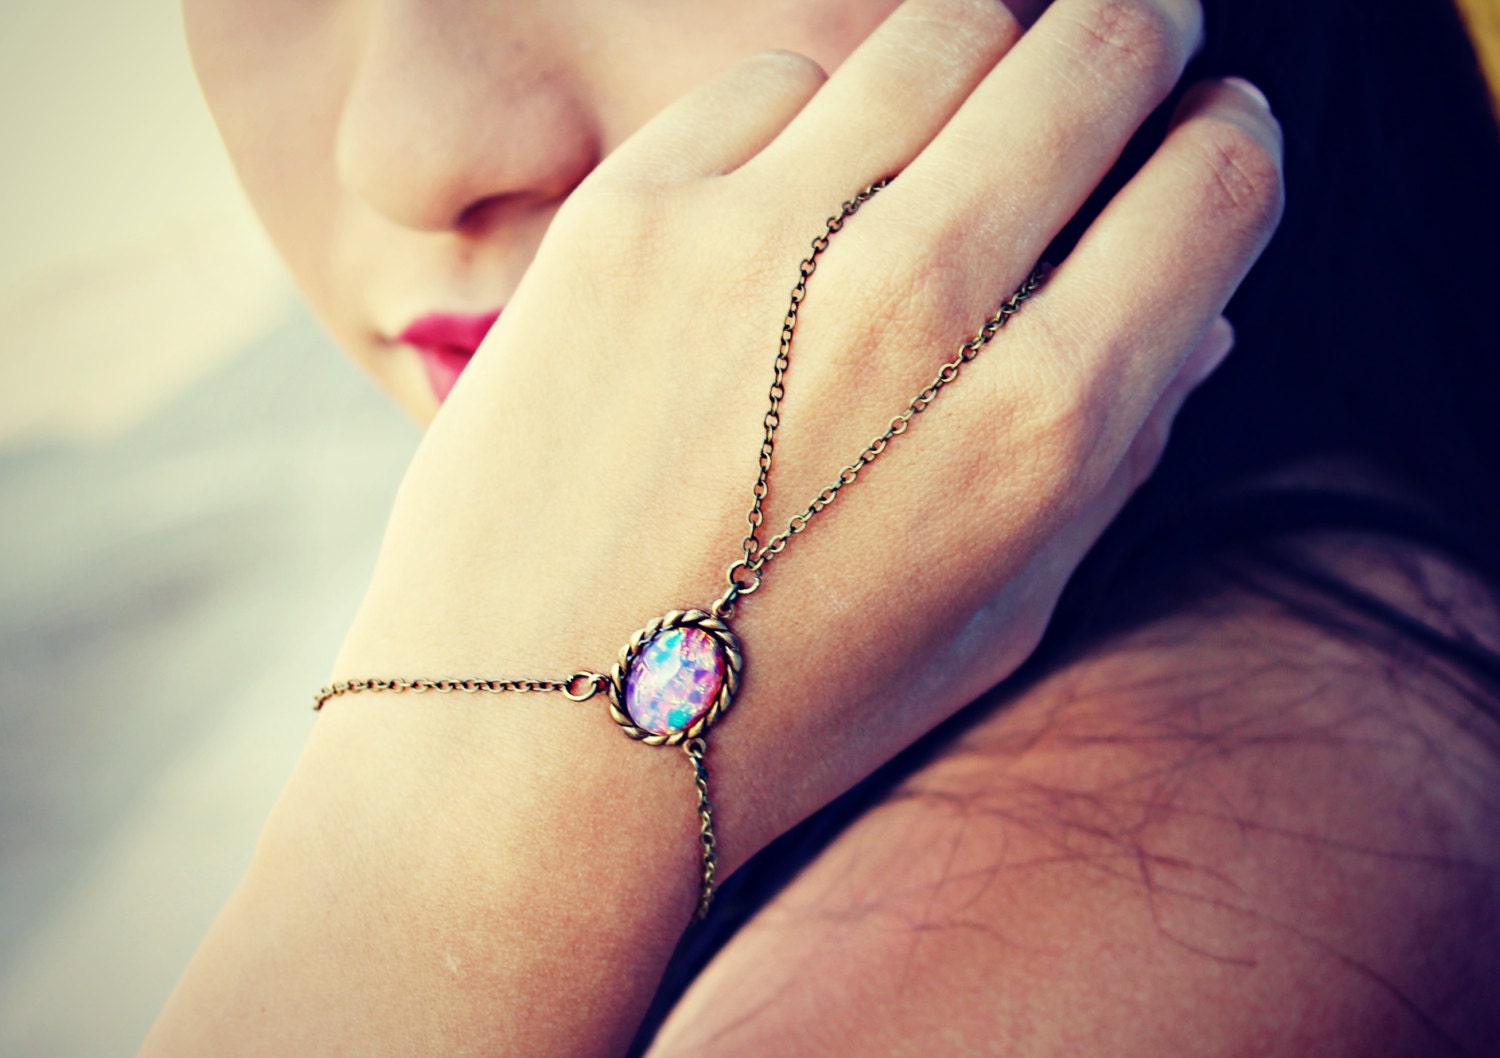
Ring bracelets have been around for centuries, and have recently made a comeback on Pinterest boards and DIY jewelry sites. The actual term for these is “slave bracelet.” I have a few problems with this.

I looked all over, and it’s difficult to trace the historical roots of this term. Some of the articles I found do not attribute the name “slave bracelet” to actual slavery, but rather to the fact that the bracelet and ring are chained together, making them “slaves” to each other.

However, this literal interpretation does not change the connotations behind the word choice. The first time I saw it used on a website, I could not believe it was the contemporary term. I immediately started googling “slave bracelet” to confirm this was the proper reference, but still feel uncomfortable using it. I don’t think the word “slave” should be tossed around so casually, and using it to describe jewelry takes away its punch.

Some people may think this is view is too “sensitive” or “PC,” but I don’t agree. People defending the use of this term say black people are not offended by it so it shouldn’t matter. First, the feelings of an entire group of people should not be generalized by individual experiences. Second, this issue is not one purely of race, but also of gender and class. Calling a fashion accessory by the same name as a practice that oppressed (and still oppresses) a large number of people is wrong. Slavery is a powerful word and should not be whitewashed for the sake of fashion.

There’s a simple solution. Can’t we just say “ring bracelets?”

Giving DIY gifts

The best part about making things is giving them away. I don’t actually sell anything, mainly because I don’t want to spoil something I enjoy by making it work.

Have you seen the show Hoarders? It spotlights people who hoard random items, and whose houses are full of precarious stacks that could topple any moment. This is what my apartment would look like if I didn’t give jewelry away. No joke.

One of my dear friends visited recently, and I excitedly showed her all of the things I thrifted over the last few months–the bird charms, colored stones and white beads. Then I realized that she must think I’m crazy, and I wouldn’t blame her if she did. If you don’t make jewelry it would be hard to understand the enthusiasm toward old, rather junky-looking thrift store finds. But if any of my friends think I’m nuts, they don’t tell me… Maybe it’s because I give them things.

I used to be self conscious about giving jewelry to other people because it wasn’t “store quality” or I didn’t spend much money on it. But if a friend gave me something they made with their own two hands, I would appreciate it even if it wasn’t perfect. Keep that in mind the next time you give a DIY gift. It’s not about what you give, it’s about the intention behind it–the fact that you made it with that person in mind.

DIY: Stone pendant necklace

In my Thrifty Tuesday post yesterday, I included a photo of some stones I found at a vintage store in Dallas. I couldn’t wait to do something with them, so I came up with a way to make them into pendants. You could do this with any stone you find.

Supplies:

  • Stone
  • Chain
  • Glue (preferably clear glue–I used a hot glue gun and it turned out messy)
  • 1 head pin
  • 3 jump rings
  • Lobster or other clasp

IMG_7585  IMG_7598

Making the pendant

  1. Wrap a scrap of chain around the top of your stone.
  2. Slip head pin through chain on the back and twist ends into a wrapped (or simple) loop at the top.
  3. Secure chain and loop with glue.

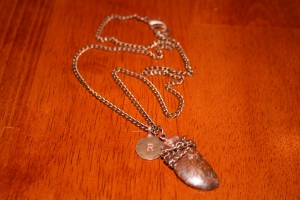
Attach pendant to chain and complete with the lobster clasp and jump rings. I also fastened a circular charm with my initial that I found in a vintage store. I only had hot glue, so the back of mine looks a little rough.

IMG_7600  IMG_7597

A clear glue like Gorilla Glue or Super Glue would probably work better. I used about 18″ of chain, so mine hangs about mid-chest. This pendant would also work on a 20-30″ chain.